Showing posts with label design. Show all posts

Sunday, November 25, 2018

11.25.18 Both bathrooms done!

I'm not a decorator, and they're not completely done, but both bathrooms are 90% done, re-assembled, and decorated. So here's the final photos.

Second floor bath:


With shower curtain (IKEA) 
Shower curtain open

mirror, vanity and towel bars


Over-toilet cabinet (love the tiny succulents I found at IKEA)

Hamper, shelves Greg built; still need artwork here


First floor bath:


Boxes have a candle, a cool shell, and a jar full of blue glass marbles and shells

Still love this mirror and vanity and light

The glass doors let in all sorts of sunlight during the day (and show off the tile work)

Real aloe and funky shells from a friend


Beach scene is a painting from my friend Margaret; starfish and turtle are cheap wall hangings but kind of fun)


Wednesday, September 19, 2018

9.19.18

Contractor was only around a little while to put some toxic smelling red stuff on the durock before tiling begins tomorrow (!!!!!!).


Not much to see beyond red:

shower niche

mixer and shower head

same as above; poorer lighting :)


close-up of right shower wall with post-its to mark where the accent tile will go

Full shower with post-its


We did, however, talk a bit about painting. To save some money, Greg and I will do the painting, and the contractor said we could wait till it's all done and paint at that point, or he could probably finish all the patching and sanding by Friday afternoon if we wanted to paint this weekend. We do! :)
He strongly recommended putting texture on the walls, as they're old plaster over drywall and uneven, patched cracks, etc. The quote to have someone professionally texturize the walls was more than we could justify, but I guess there's spray-on texturizer that comes in a can, and you can buy it at your friendly neighborhood construction/hardware type store. So I took another trip to Home Depot, returned some things, and picked up the texturizing spray, paint (gasp--so much pressure) and materials to paint. Wish us luck this weekend.


As for the paint color, we actually bought towels and a bath mat ahead of time so that we could find a paint in a similar color family. I took one to Home Depot and came home with a gallon of Gentle Sea. The color may not be very accurate below, but you can see it at this link. It's a grey-green blue color, which is not my usual color family, so I'm crossing my fingers.


Tuesday, September 11, 2018

9.11.18

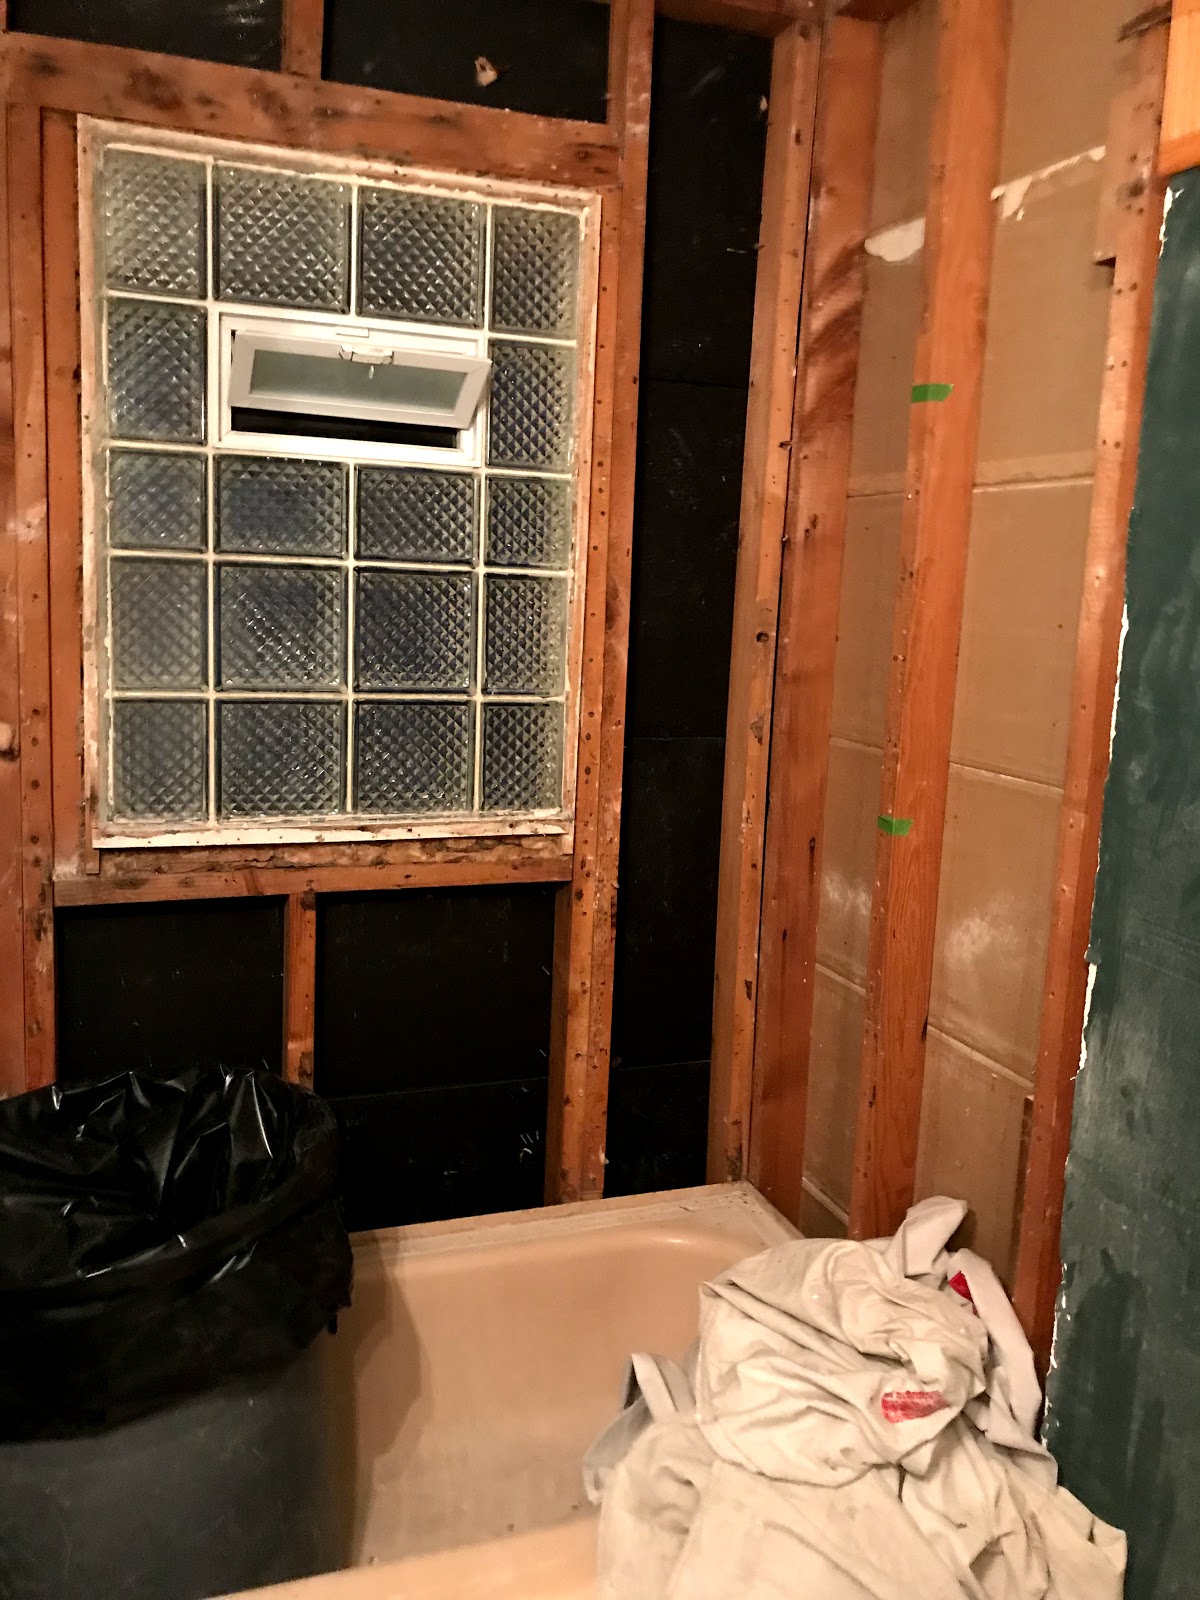
Demo on the first floor bathroom begins!

A bit about the plan:
When we bought the house in 2001, it had one full bathroom (this one) and a toilet and sink in the basement. We put on an upstairs addition in 2007, which added a second bathroom, but we did the remodel on the cheap, and got talked into a modular shower thing that I never liked, and over the last few years have come to HATE. When we put the master suite upstairs, we lost a closet in the existing upstairs bedroom, so it became an office. Although our kids were older by then, I always thought it would be a nice nursery--attached to the master bedroom through the master bath. Anyway, that's a long way of saying that the master plan for the bathroom remodels includes changing the first floor tub into a shower, and putting a tub in the upstairs where there's currently just a shower.

We weren't looking for a full demolition to the studs and re-build, but it seems that that's all contractors want to do in Whitefish Bay. So after obtaining four outrageous remodel-to-the-studs bids, we found someone to do just what we want--swap tubs for showers, and a lot of tile work on the showers and floors. And since we refinanced our house for the two previous remodels, we're doing this one (I hope...) with just our savings.

Of course not going with a full-service kind of contractor meant we had to do a lot of choosing, purchasing, and hauling materials. I find doing things like picking paint colors stressful, so something more permanent like tile has really caused angst. I hope I haven't goofed up.

We're doing the same tile (white subway) for both bathrooms, but with light gray grout on the first floor and white grout on the second.


The floor of the shower will be small dark gray squares with the same light gray grout. (The marble slabs are for the shower base):


And the floor of both bathrooms will be wood-look gray tile


There are many more choices that had to be made (which tub, what niches, what vanities...) but I'll get to those as the project moves along.

I'm still trying to choose accent pieces for both bathrooms, though. I bought three possibilities, but only need two. Open to suggestions. Each one would be cut into about 4 strips to make a skinny strip of accent. Remember the first floor will have grey shower floor and grout and the upstairs will be white tub and white tile and grout.
Choice A--most reasonably-priced; leaning toward first floor so as not to add too much extra, but could be upstairs with all the white
Choice B--could go either one. Might be a nice burst of interest in the all-white upstairs bathroom, but might look cooler with gray grout downstairs (p.s. it's marble and glass)


Choice C: the only one I liked at all at the tile shop (that wasn't $50 a square). It's stone and glass and different sizes, so adds interest there. But I'm not in love with it (and it was the most expensive


And today demo began:


Monday, November 21, 2016

11.21.16

We did have one small project that we wanted to do in the kitchen, but we kind of ran out of money before we could do it:  installing a tile backsplash.  (It's pretty pricey and the installation is really expensive) Several friends said it was easy to do, and when one of them (Margaret) even offered to help and to loan us her tools, we decided to give it a try.  No time like the week before Thanksgiving to rip apart your kitchen, right?  :)


Before pics:


During pics:


After pics:


I absolutely love it!

All told, it took about 21 man-hours and cost just over $200.  Totally worth it.  :)


Friday, February 19, 2016

2.19.16

First day!

Already the demolition begins.  We are minus a door and a window:


North-facing door.  Gone!
North facing window. Gone.


as seen from the outside


And we are almost minus another window, except that the screwy wiring in our house means that we need an electrician before the window can actually be converted to a patio door.
See the conduit running under the window?  <sigh>
Old door and window

As far as what the "new" will look like, let's just say that it is probably good that this project is moving so quickly because I keep changing my mind on colors and over-thinking things.  This is a big deal and it's not like just painting a wall.

For the outside, we're going with Timber Bark (from James Hardie) for the siding.  Window and door trim, as well as gutters and soffits and downspouts will be white.

For the inside, we designed everything around the distressed bamboo flooring that we fell in love with.  Here's a picture from the website:
Distressed dark honey bamboo

We then chose the cabinets to accent the distressed look of the floor.  We're going with a hazelnut-glazed Newport style.  From the website (although it doesn't look this dark in real life):
Newport painted hazelnut glaze
And the countertops are what caused me the greatest stress.  But I'm pretty excited for our choice: HiMacs (i.e.: Corian) solid surface in graphite granite.  From the website:
Graphite Granite HiMacs Countertop
If you put all the samples together in the showroom, you get:
Whee!!!